

I. Introduction
This article is the second in a series of three on how to create and sell an NFT. This one takes you through step-by-step how to mint an NFT collection using AtomicHub’s NFT Creator. The first article in the series provides an overview of the process, and the third and final article covers Atomic Hub’s Market and Trading services.
II. Step-by-Step Guide
1. Create Collection
Open up the AtomicHub and click on ‘NFT Creator’.

Click on the ‘Create New Collection’ button to navigate to the ‘Create Collection’ page:

Follow all the guidelines beneath each of these fields, noting that mandatory fields are marked with a red asterisk.
- Click on ‘Add a collection photo’ and upload an image
- Type in your ‘Collection Name’, ‘Display Name’, ‘Website URL’ (optional), and ‘Collection Description’ (optional)
- Set your Market Fee (i.e. 0% up to 15%) `– this is what you get on every secondary sale
TIP: setting a higher Market Fee percentage is going to discourage buyers unless of course your NFT collection is aimed at raising support for a project. You can change this percentage later – but remember that will soak up a tiny bit of your RAM as you are again re-printing onto the blockchain.
You can ignore the ‘Advanced Details’ button below the main dialog, as it is an optional step. But if you are curious this is where you can set up which other WAX accounts can own or edit the collection – great if you are working with other people on a project (e.g. if you are in a band). You can also set which other AtomicHub accounts get notified of any transactions, (e.g. your band’s record label) which helps to keep things transparent.
When you are ready, click on the ‘Create Collection’ button. This will use up some RAM and trigger a WCW dialog asking you to ‘Approve’ the transaction.

Once you click on ‘Approve’, you will get an AtomicHub ‘Transaction Successful’ confirmation, along with a code. Don’t worry about having to remember all this – it is stored in the WAX blockchain and you can log into the blox.io WAX page to check all your transactions.
Now click on the ‘Close’ button to continue.
Take a look at your RAM indicator – you will see that your RAM usage has gone up a bit. Remember, you can buy more resources at any time, but generally, it is good to have at least 5KB free while you are minting.

Now click NFT Creator at the top of the page. You will see your new collection icon below, next to the ‘Create New Collection’ button. This is permanent. However, you can edit and update your collection attributes at any time — but it will cost RAM.

You have completed your first step! Your collection is now permanently on the WAX blockchain.
2. Create Schema
Next, you need to set the common attributes for your NFTs. This is done in what is called a ‘schema’. Consider that different types of digital files like text, audio, video, and images may need different attributes. Your collection can also have more than one schema for different types of NFTs. That means your collection can have a mix of audio, video, images – in fact, any kind of digital file!
TIP: Make sure you think through your schema and complete it before you mint an asset. If you mint an asset and then extend the schema, subsequent NFTs will be able to use the extended schema’s attributes, but the ones you minted beforehand will not.
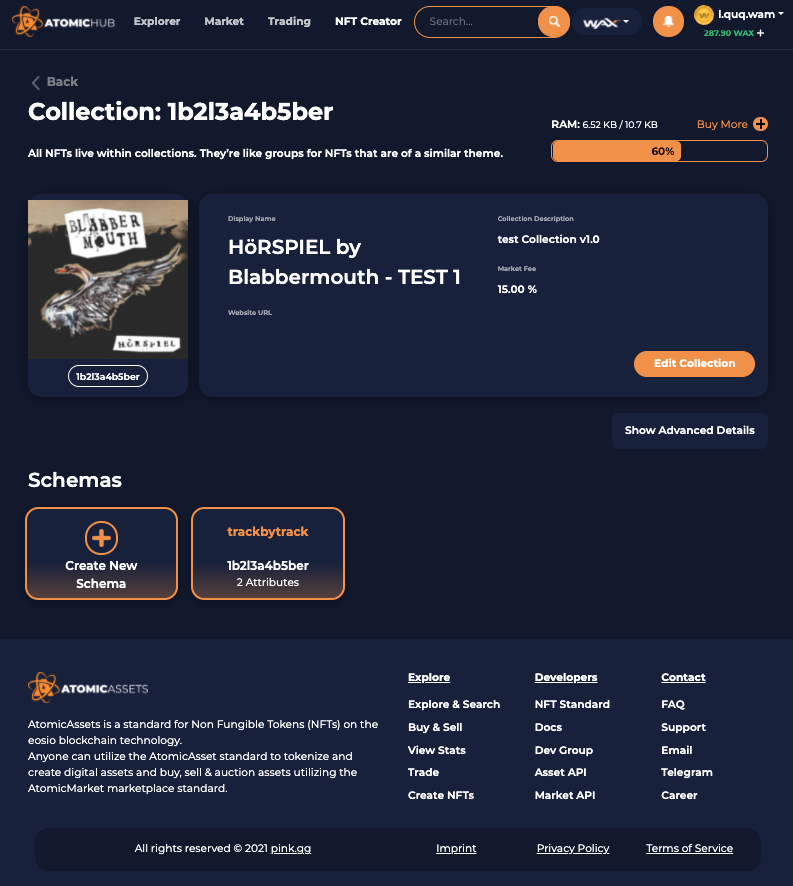
To create a schema, you can click on the ‘View Collection’ button to be taken to this page:
Clicking on the ‘Create Schema’ button takes you to the page where you set the attributes:

Follow all the guidelines:
- Name the schema (12 characters max, no uppercase letters, and no more than 6 integers)
- Keep the ‘Simplified Types’ box ticked for now (that’s for experts and developers)
If you want to add a new attribute, click on the ‘Add New Attribute’ button, which will take you to this dialog:

To add a new attribute you have to set both the ‘Attribute Name’ and an ‘Attribute Type’ by typing in the name and using the dropdown menu for the type. The options in the dropdown menu deal with the type of attribute — for example, if it is an integer number (a year date), some text (a description or a haiku), an image, a boolean (a basic switch for TRUE or FALSE) and last but not least an “IPFS hash”.
IPFS stands for InterPlanetary File System. Choose this if you want to add in a video or piece of music that exceeds the current AtomicHub limit of 2MB per file. See the first article in this series to find out more.
TIP: If you do create a new attribute that you do not want, remember it cannot be deleted because you just minted it onto the WAX blockchain permanently. Don’t worry though – you can just leave it blank — it might just look a bit untidy. Just something to keep in mind!
Once you are ready and have clicked the ‘Create Schema’ button, you will again go through the same WCW Approval process as you did when you created your collection. Remember to fill all the mandatory fields in order to proceed!
If you happen to have run out of a resource (for example, CPU), you will see a warning dialog like this:
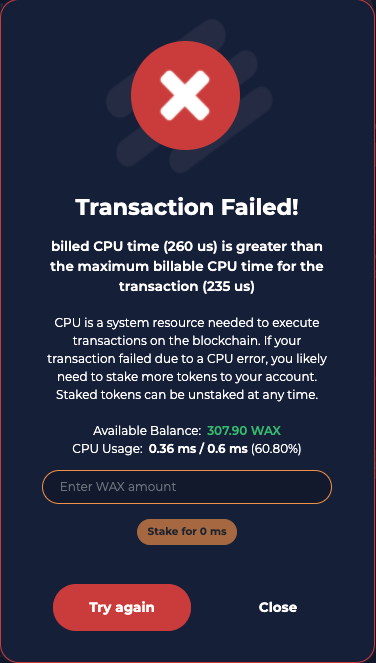
Don’t worry! You click on the ‘Try again’ button or stake some of your WAX to get more resources. For a more detailed explanation of staking and voting, see here.
Now is perhaps a good time to check your collection and schema. You can do this by clicking on NFT Creator at the top menu of AtomicHub. Click on the ‘View Collection’ button on the icon. Click anywhere on your schema icon (next to the ‘Create New Schema’ button) and check the details are all correct.
If you want to edit your collection or add a new attribute, it will cost a bit of RAM. If you are happy with what you have done, go onto the next (optional) step: ‘Create a Template’.
3. Create Template
Navigate your way to your schema icon and scroll down until you see the ‘Create New Template’ button. Click on it to be taken to this page:
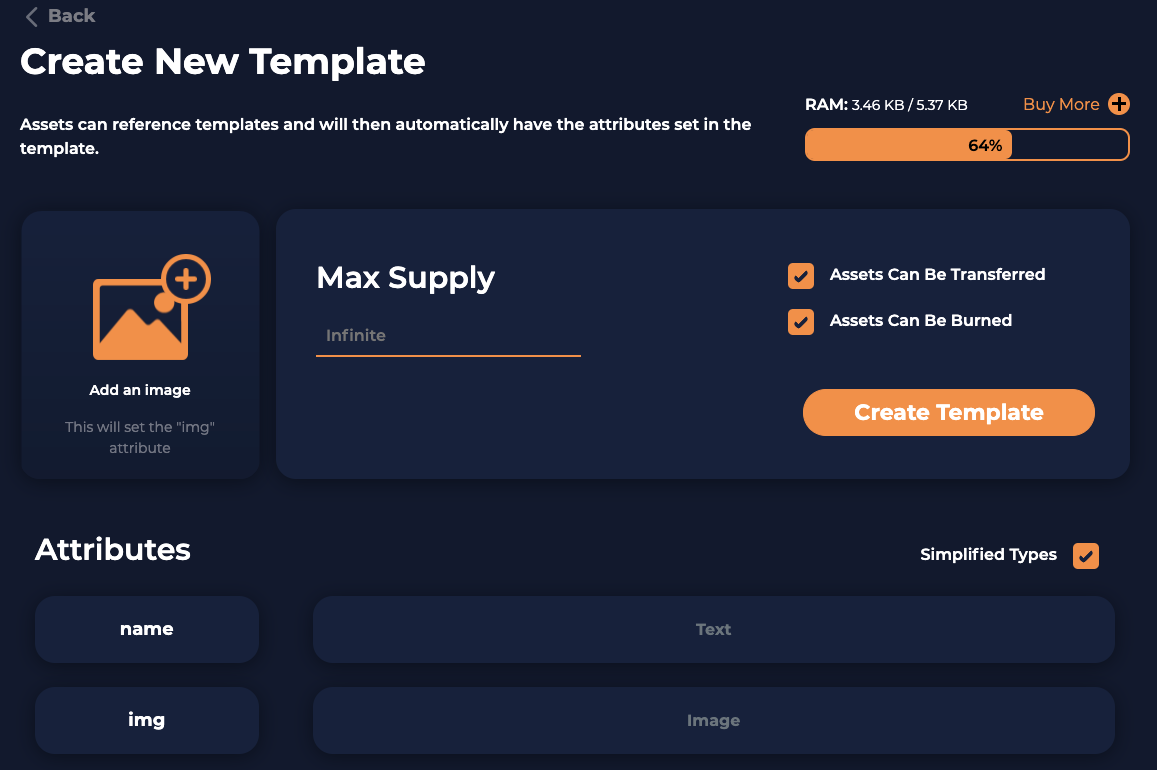
Follow all the guidelines which appear underneath all of these fields:
- Upload an image and set the ‘Max Supply’
- Name your Template
- Leave the 2 boxes ticked:
- “Transferred” – this means that your asset can be traded
- “Burned” – this means that your Asset can be deleted later and the backed WAX coin can be reclaimed
- You can keep the ‘Simplified Types’ box ticked for now
Once you are ready and have clicked the ‘Create Template’ button, you will again go through the same WCW Approval process as you did when you created your schema.
Again, check your RAM afterward — you will see that your RAM usage has gone up a bit.
TIP: the main purpose of a template is to help you define and organize your Collection. You will also see that templates are based on your schema. As it says on the page: ‘assets can reference templates and will then automatically have the attributes set in the template’. It is worth understanding this because you will find that templates are a very useful layer of customization and will save you time, RAM, and all the other resources.
You have completed all the 3 main structural steps — now you can start minting!
4. Mint Asset
Go back to NFT Creator again, and click your ‘View Collection’ button and then your schema icon until you see the ‘Mint New Asset’ button by scrolling down below. Clicking on this button will take you to the following page:

Again, follow all the guidelines:
- Upload an image for your NFT
- Set the template (if any)
- Name your asset (i.e. the NFT)
- Set the number of copies
- Keep the ‘Simplified Types’ option box ticked for now
When you’re done, click the ‘Create Asset’ button which will take you to a Summary dialog.
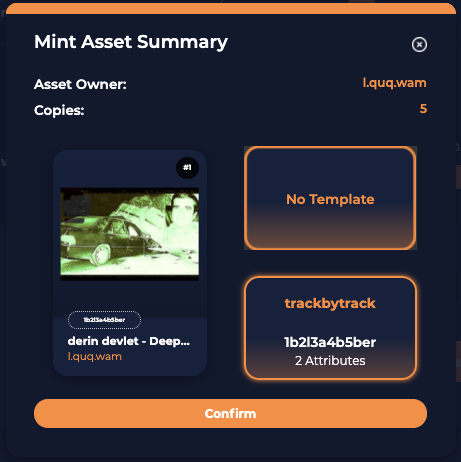
Check all the details. If you are happy, go ahead and click ‘Confirm’.
You have just minted your first NFT. Congratulations!
III. Conclusion
WAX is designed around the best and greenest distributed technologies, so you are in the best place to start your NFT collection here. Next, check out our article on how to sell and trade NFTs on WAX.